


In this tutorial I’m going to show you how to create a hosting plan using Plesk (Plesk Tips and Tricks) . If you want to see our previous plesk articles:
- SSL It! (Plesk Tips and Tricks)
- How to configure DNS for a domain in Plesk
- How to Configure DigitalOcean DNS extension on Plesk
- Configure Slave DNS manager extension on Plesk
- How to Create a Subscription in Plesk (Plesk Tips and Tricks)
Adding a Service Plan
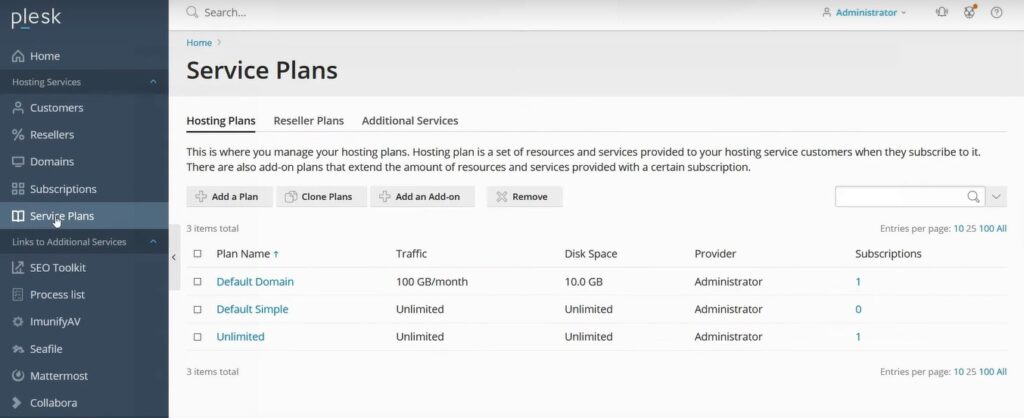
Now, first of all, click service plans in the menu on the left. And then we click “Add a plan”.
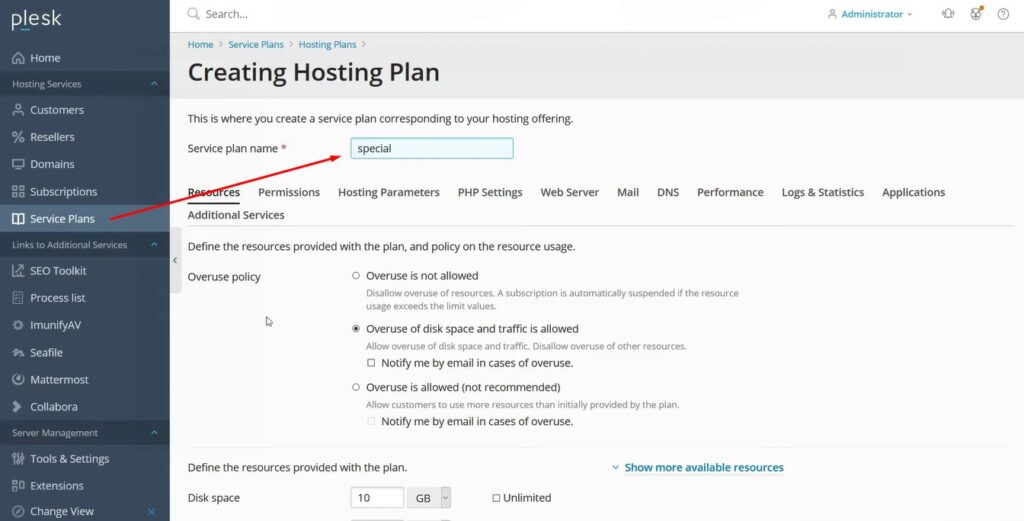
Then, the service plan needs a name, so I shall just pretend this is some kind of special offer. So I shall call it “special”. Then we have an overuse policy which we can select. We can select things like how much disk space how much traffic.

Since I’m not restricting overuse. I will actually tell it to inform me when it reaches 90 gigs of disk space. So we can keep an eye on it.
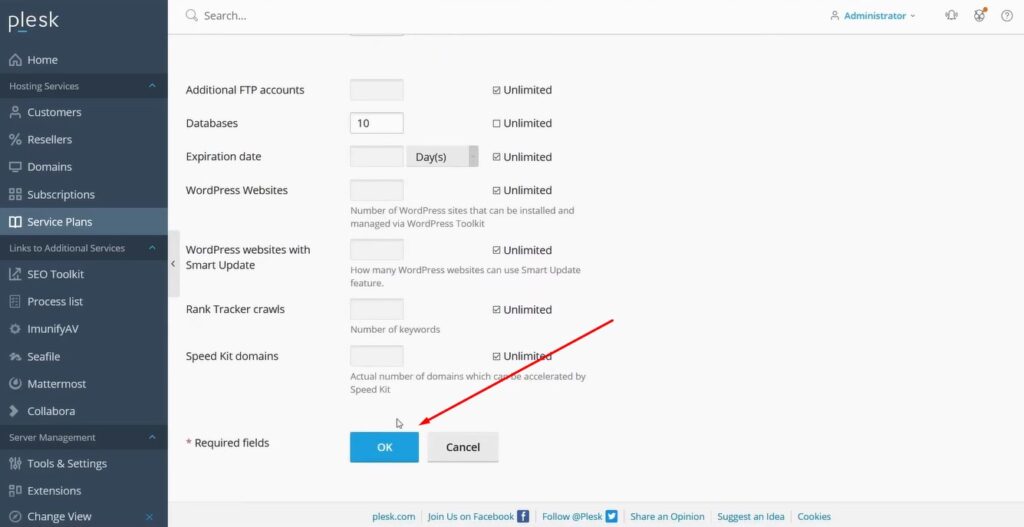
And then just click “Ok” once you’ve selected everything.
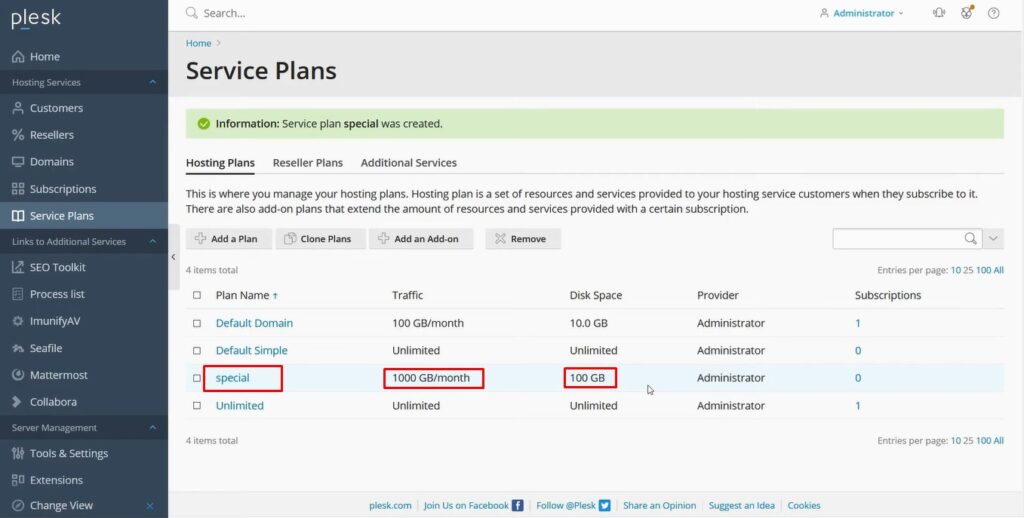
And there’s the plan ‘Special’ created. Finally now hosting plan is created.
Add an Add-on for creating hosting plan in plesk

We can also add add-ons which can be applied to the service plan.
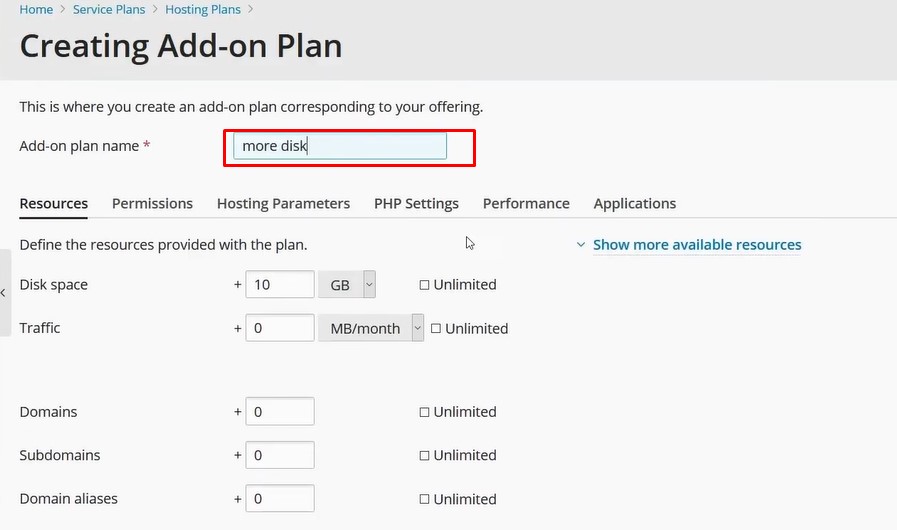
So for example, in this case, maybe customers are requesting more disk space. So we can create an add-on for an extra 10 gigs of disk space. We shall call it “More disk”.
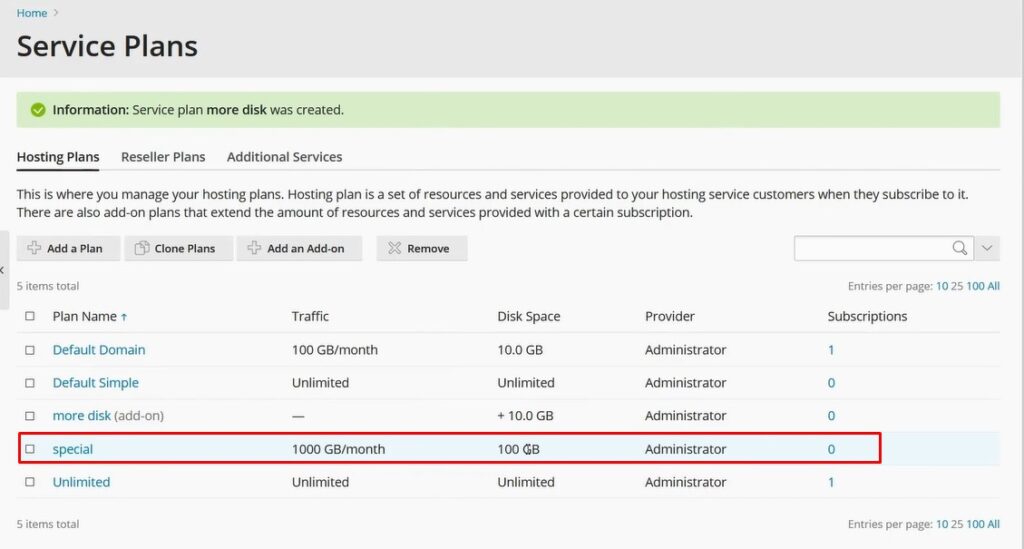
Finally here we have an add-on ‘More disk’ which can then be applied to the service plans. And together they make up a complete hosting plan.
Thank you very much for reading (How to Create a Hosting Plan using Plesk). And make sure to check out other articles in this series where we’ll give you more hints and tips on how to use Plesk. So don’t forget to check out our blog page.


