


This article is about how to configure aws cloudfront with wordpress website. So you need to just do this you need a wordpress with a wordpress website and an aws account.
Creating User
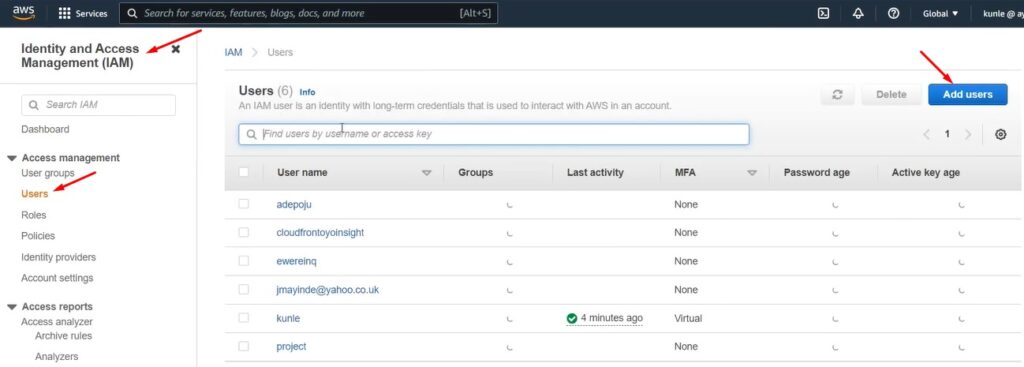
This is my aws management console so the first thing is that you go to IAM. So once you get to IAM you go to your users then you are going to add your new users.
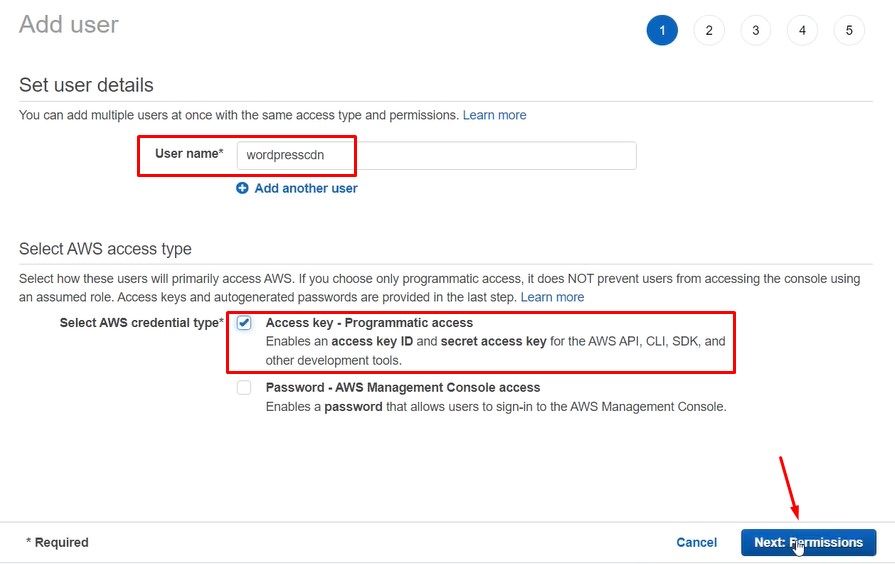
For you to add new user for this I’m going to call it “wordpresscdn” you’re going to give it an “access key programmatic access”.
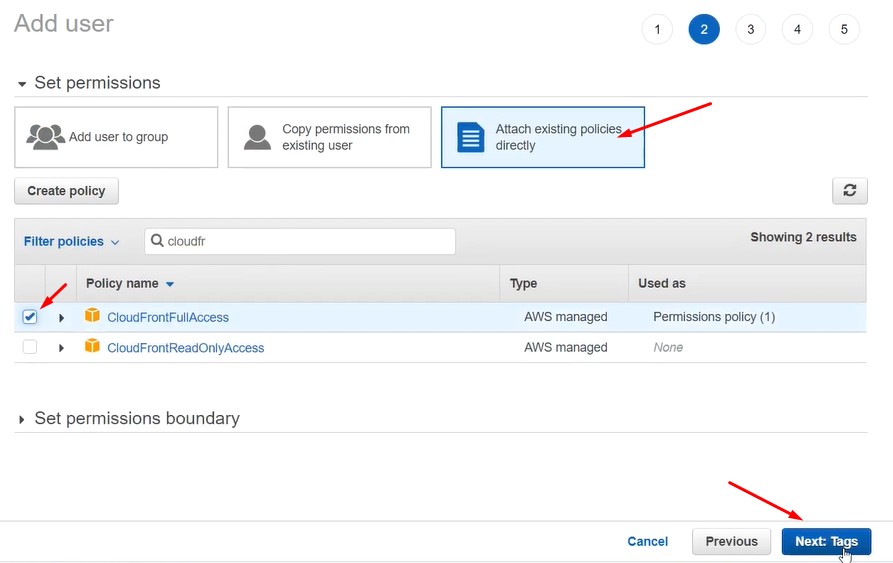
So you go to nest then we are going to attach an existing policy. For me i’m going to search for cloudfront. So I’ll give it CloudFrontFullAccess.
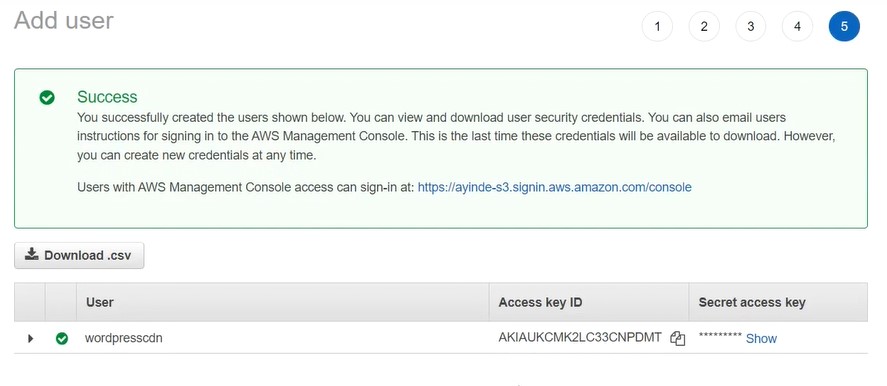
Then go to next it will ask for add tags which i leave as it is then next to review. Then i have my access key from cloudfront. So the user has been created we have our access key id and our secret id. The access key id is just just like username my password. Please don’t share with any other person.
Installing WPAdmin AWS CDN plugin
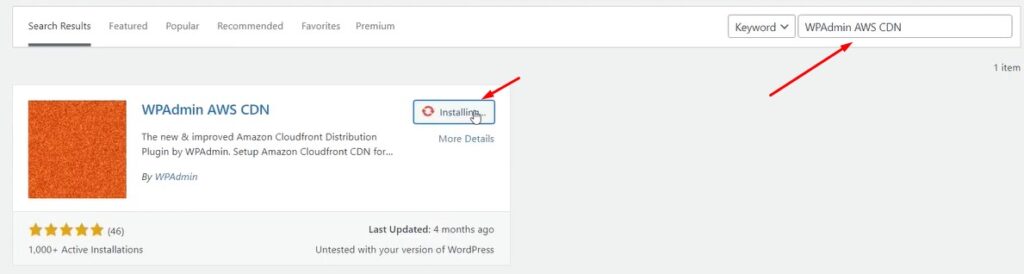
So i have my website designed in wordpress so i go to plugin. I go to add new plugin and search for “wpadmin aws cdn” is the plugin we’ll be using in order to connect our wordpress to aws cdn.
I’ll install it then i’ll activate it once my wordpress plugin has been activated. I will go down to where my plugin is and click setup.
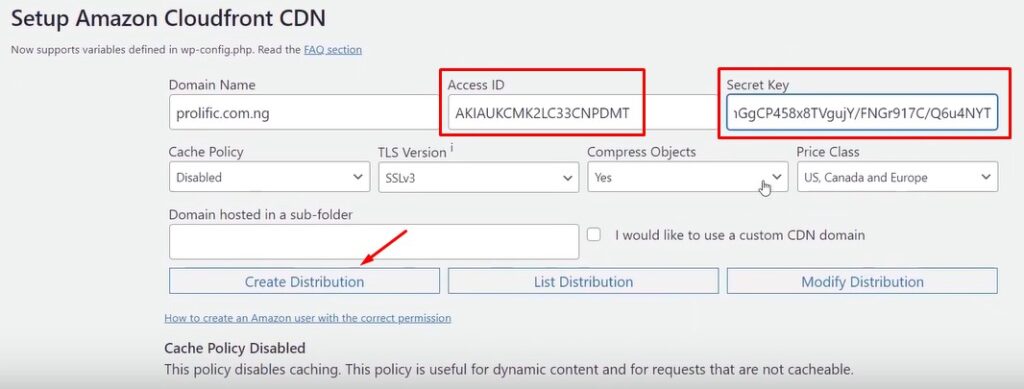
from the setup environment it’s asking me to have my access key and secret access key. You remember so i’ll go back and copy my access key id and my secret key access so i paste it here.
And i’ll create a distribution that it’s going to connect my wordpress to my aws cdn.
Configure aws cloudfront with wordpress activated

Finally you can see i’ve successfully connected it. so i’m going to reload the page. After you have reloaded the page. Wow it’s saying CDN is active.

I will go to my website then right click and try to inspect you can see that my site is being serve from cloudfront.
If you want to learn more you can visit our blog page.


