


Hi guys Today we’re going to see how to add social share buttons on WordPress website. Now let’s say you have a website or a blog, and you want your visitors to share your content, on their social media platforms.
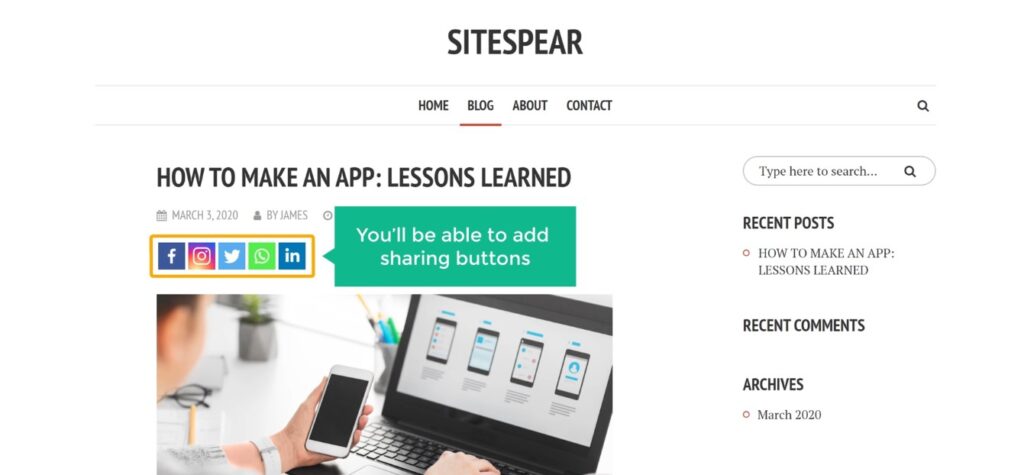
You can do that easily by adding social sharing buttons to your website. So after reading this article, you’ll be able to add sharing buttons like these. And if your visitors click here, they’ll be able to share your content, on their social networks.
Let’s add social sharing buttons to our website First, We will go to our website. Now this is the site, where we’re going to add the social sharing buttons. So to add the buttons we’re going to do 3 steps.
Install a plugin on your WordPress site – to Add Social Share Buttons

The first step is to ‘Install a plugin on our wordpress site.’ So to install the plugin let’s go here Now go to plugins and click ‘add new’ Now Search for a plugin called ‘social share’. And you’ll get this plugin. This is the plugin which is going to help us add the social sharing buttons on our website. So to install the plugin, Let’s Click install and then click ‘activate’. So now we have successfully installed the plugin.
Once you’ve installed the plugin. we can now go to step 2 which is to ‘choose the social networks, you want to add to your site’. So to choose the social networks.
Let’s click here And it will take you to this page.
Choose the social networks you want to add to your site

Now click ‘standard interface’ And here you can see a list of social networks, which you can add to your site. Now select the networks which you want to add. I’m going to select these.

And now you can see that, the networks we selected are shown here.
Choose where you want to display your sharing buttons

Once you’ve selected the social networks we can go to step 3 which is to ‘choose, where you want to display your sharing buttons’. So to choose the place, Let’s scroll down. And here you can see, all the places where you can add your sharing buttons. Let’s say you want to display the sharing buttons on your blog post like this. Then, you need to enable this option. Now once you’ve selected the location, Next, you need to choose the position where you want to display your buttons. Now if you want to display the buttons above your content like this. Then enable ‘top’ here And if you want to add the buttons below your content, enable this. Once you’ve selected these options, Click ‘Save changes’. And As soon as you click ‘save changes’ Your sharing buttons will be added to your website.

So now if we go to our ‘blog post’ And click refresh. You can see that, we now have the sharing buttons. Now if a visitor likes this blog post, And wants to share it all they have to do is. Just click here, And now they will be able to share your post on Facebook. Okay this is how your visitors can share your content on their social network. Now you know how you can add sharing buttons, to your website.
Change the design of social buttons – to Add Social Share Buttons on WordPress

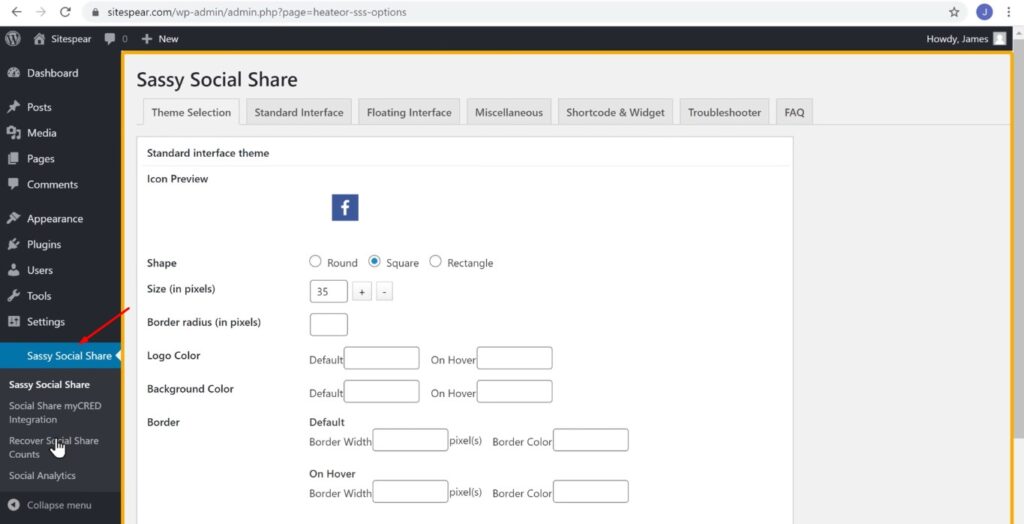
Now once you’ve added the buttons, what if you want to change the design of these buttons. So Next, let’s see how you can change the design of these buttons. So to change the design, Let’s go to wordpress Now go to ‘theme selection’. And here you can see that, we have different shapes for our buttons. Now choose the shape you want I’m going to choose this-one and here you can see the preview of how the button will look like. Once you’ve selected the design, Just click ‘Save changes’.

Now if we go to our website and click ‘refresh’. You can see that, our button design has been changed. So this is how you can change the design of your buttons.

Okay! So now, let’s see how your sharing buttons will appear, on our mobile. so lets open our blog on mobile. And as you can see this is how the sharing buttons will appear on your mobile.
Floating share buttons – to Add Social Share Buttons on WordPress
Okay So next, let’s go to part 2 of this tutorial where we see ’how you can add a sharing button, which floats on your screen. So to add the floating share buttons, Let’s go to our wordpress dashboard, And then click ‘floating interface’. First, we need to choose the social networks we want to add.

So I am going to select these And Next let’s scroll down.

And now you need to choose the place where you want to display your floating buttons. I’m going to choose ‘homepage’ And then click ‘save changes’.

Now if we go to our homepage and click ‘refresh’. You can see that, we now have our floating buttons Next, let’s see how these buttons will look on our mobile.

Let’s go to our website on our phone And as you can see, this is how your floating buttons will appear, on mobile phones.
Okay Next, let’s see how you can show the number of shares, next to your share buttons. So to show the number of shares Let’s go back to our wordpress dashboard.

Now go to ‘standard interface’ And then Scroll down And here, you’ll have an option called ‘show total shares’. Just enable this option. Now if we click ‘save changes’.

And then go to our website, and click refresh you can see that, it now shows the share counts. so now we’ve successfully added the share counts but if we click here And share this post on Facebook. You can see that, the share count does not increase Now in order to get the share count to work, We need to connect our website, with Facebook.
Connect our website with Facebook

So to do that, let’s go to our dashboard, and then go to this tab Now to connect your website with Facebook. You need to get these 2 details from Facebook, and then paste it here. So to get these details let’s open a new tab and then go to ‘developers.facebook.com’. Now click ‘login’ and then login to your Facebook account.

Now to get the details, let’s click “Get Started” and then click ‘next’ Now select ‘other’ And then click ‘create app’ now enter ‘social share’ And then click ‘create app id’.

And it will take you to this page.

Now to get the details, Click ‘settings’ and then click ‘basic’. And here you’ll get the details which you need to enter on your website. Now to get the share counts working, all you need to do is, just copy these details & paste it on your website.
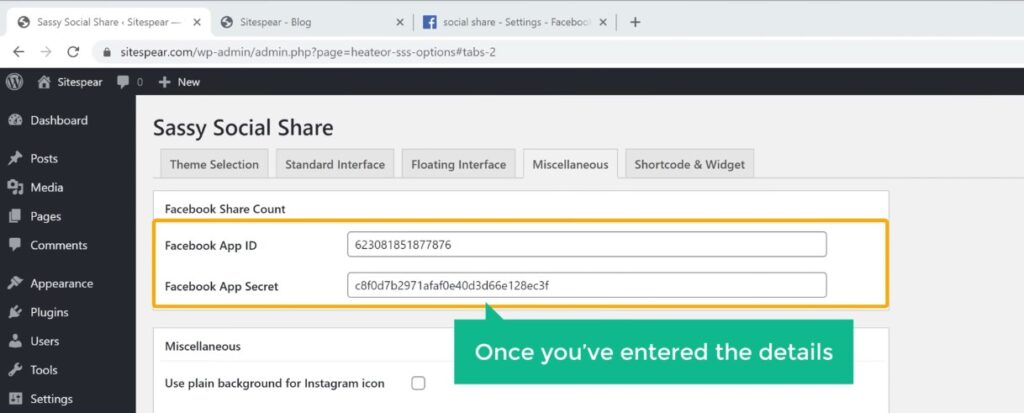
So let’s copy this and then paste it here. Then let’s copy this and paste it. So once you’ve entered the details Let’s Scroll down and click ‘save changes’. As soon as you click ‘save changes’ your share counts will now be working So to check it.

Let’s go to our website Now if we share this post on Facebook.

And then click ‘refresh’. You can see that, the share count has increased. Now you know how to add share counts to your sharing buttons. Next, let’s add share counts to our floating buttons.
Adding share counts to our floating buttons

So to add the counts to the floating buttons, Let’s go back to our wordpress dashboard And now go to ‘floating interface’ and then scroll down and enable the ‘total shares’ option. Once you’ve enabled this, Now if we click ‘save changes’ And then go to our homepage and And click refresh.

You can see that, we have now got the share counts. So this is how you can show the share counts to your visitors.
Adding social media button on product page
next let’s go to the Bonus part of this tutorial, where we see, how you can add social sharing buttons, to your eCommerce website. Once you add these buttons your visitors will be able to share your product, on their social networks.

So to add our buttons on our product page, Let’s go to our wordpress dashboard. Go to ‘social share’ and then click ‘standard interface’ Now Make sure you select the networks you want And then scroll down Now choose the place where you want to display your sharing buttons. As we want to display the buttons on our product page Let’s select ‘woocommerce product page’. And Click ‘save changes’.

And now the share buttons will be added to your e-commerce products. Now if we go to the product page and click ‘refresh’ You can see that, we now have the sharing buttons on our product.

And now if you click any of these buttons, you can share this product on that platform. Okay That’s it, guys. This is how you can add social sharing buttons to your wordpress website.
Now if you want to learn more about wordpress, visit our blog page.
