


Hi guys, Today we are going to see, how to add custom fonts in WordPress website. Let’s say you have a website And you want to change the default font on your WordPress Website You can do that easily by reading this article.

So after reading this article, You will be able to change your website’s font, like this so let’s get started. Let’s change the font on our site First, let’s see our site, where we want to change our font.
Change your font using the ‘Customize’ Option

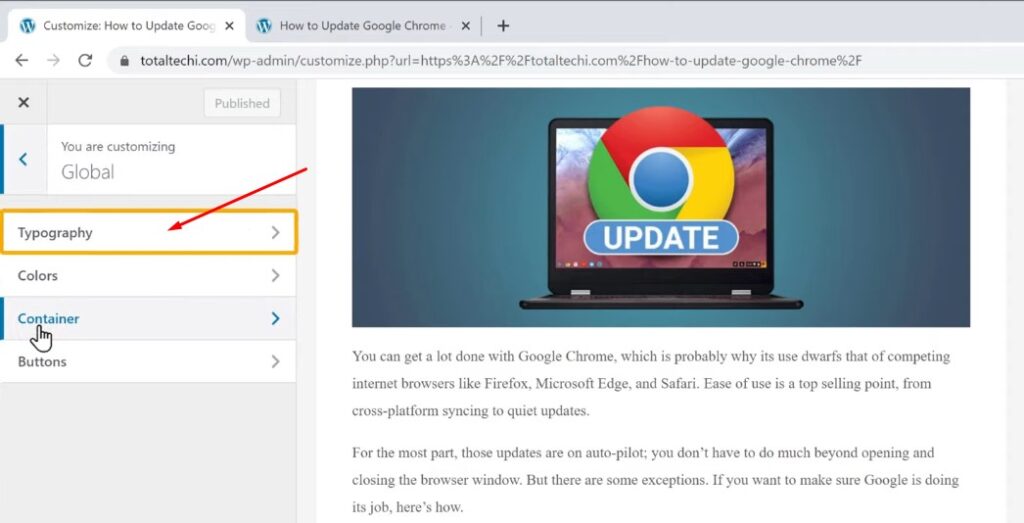
So this is the site, which I built using WordPress So to change the font, there are 2 methods The first method is to change your theme settings using the customize option So to change the font Let’s go our site Let’s click ‘Customize’.
And it will take you to this page, Here you can see we have global option. Now for some themes, this option may not be available. So If you don’t have this option, you can skip to the second method.
okay Now to change the font, Click on ‘Global’ and click ‘typography’.
Fonts Family Selection

Now if you want to change the font for this part of the content. just click ‘Base Typography’.

And then select fonts Now you will get the list of all the available fonts, like this. Here you can choose the font you want I’m going to select Karla.
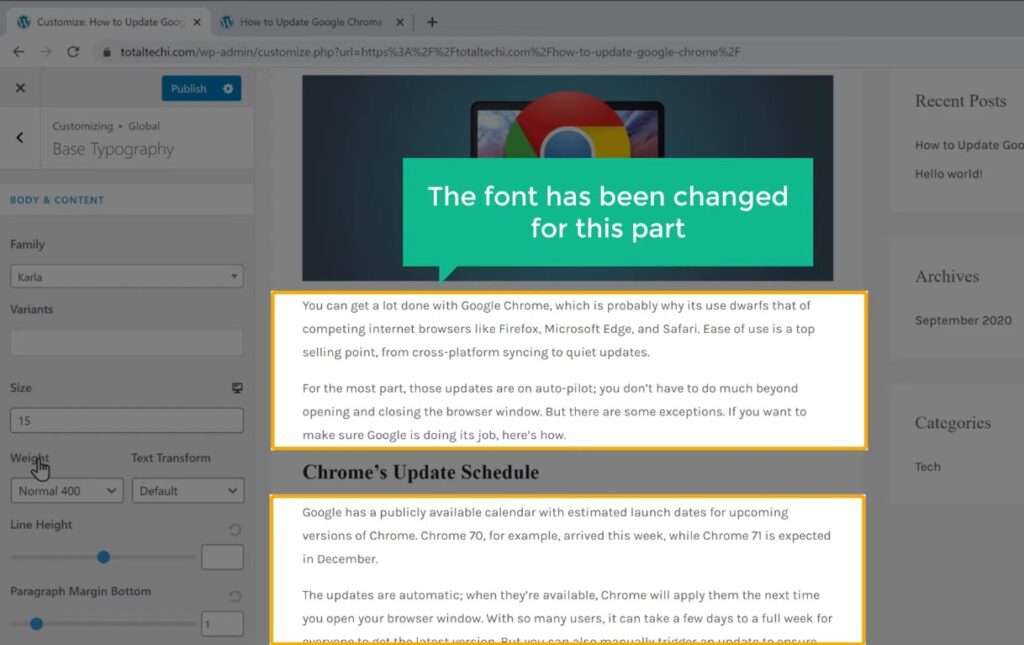
And as you can see, the font of our website has been changed for this part.

Now go back and if you want to change the font for all the headings on your site Just click ‘headings’.

Now select fonts and select the font you want I’m going to select this one. And as you can see, the font has been changed for all the headings Now to save the changes, Let’s Click ‘Publish’.

So now if we go back to our website And click ‘Refresh’. You can see that, we have changed the font on our website. So this is how you can change your font using the ‘Customize’ option on your theme.
Okay, Now, some themes will not have the an option to change the font inside the ‘Customize’ menu. Let’s say you have a theme.
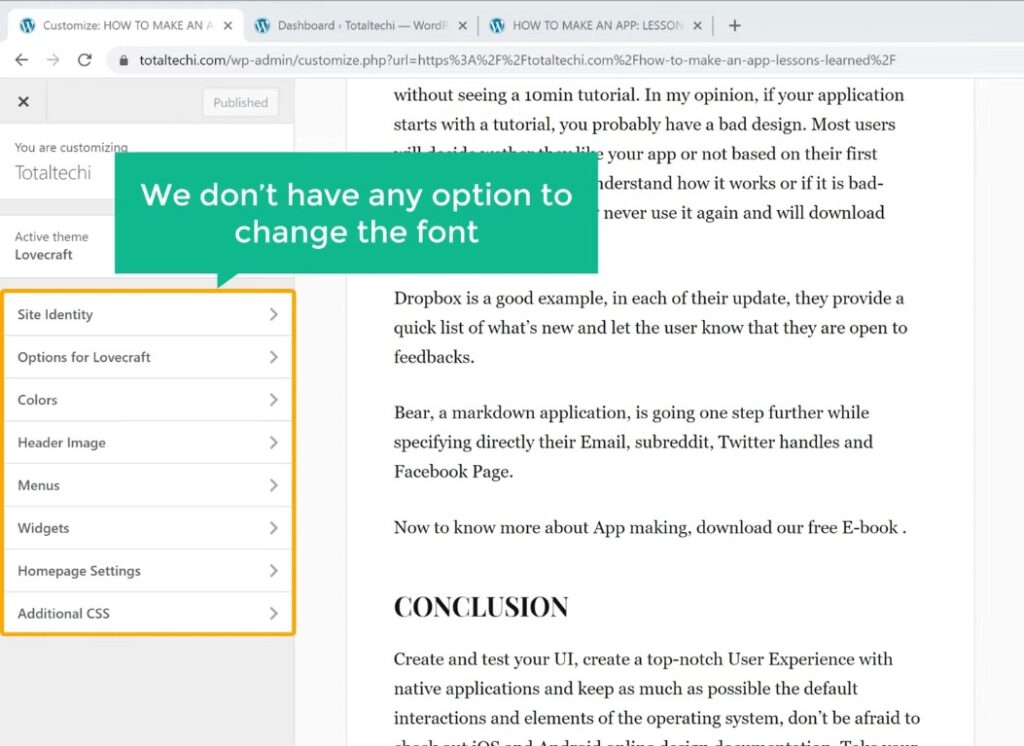
Now if we go to ‘customize’, you can see that, we don’t have any option to change the font. So now how will you change the font on this theme.
Use a plugin to Add Custom Fonts in WordPress
Next, Let’s go to the second method which is to use a plugin to change the font. Now using this method, you will be able to change the font on any theme In WordPress. So to change the font using this method, First, we need to install a plugin.
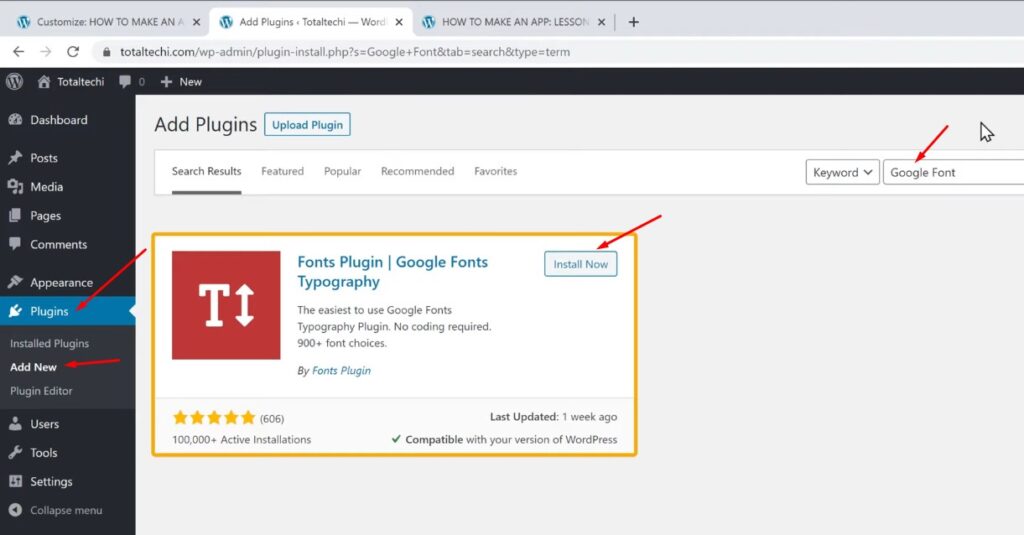
So to install the plugin, Let’s go to our WordPress dashboard, Now go to ‘Plugins’ and click ‘Add New’. Here, search for ‘Google font’ And you will get this plugin. Now, this is the plugin which will help us to change our font. So to install this plugin Let’s click ‘Install’ And then click ‘Activate’.
So now we have successfully installed the plugin. Now to change the font using this plugin Let’s go back to customize.

Now if we click ‘Refresh’ You can see that, we have got a new element called ‘Google Fonts’. So let’s click it And click ‘Basic Settings’.

And you will get this option Now if you want to change the font for paragraph of your content Just select fonts and then select the font you want I’m going to select this font. As you can see, the font has been change for this part.
And now, to change the font for all the headings. Just select headings fonts and select the font you want And as you can see, the heading font has been change. Now to save the changes, Let’s click ‘Publish’.

So now if we go back to our site And click ‘Refresh’. You can see that, we have successfully changed the fonts on our site using a plugin.
Debugging Option
Now for some themes, the font which you selected may not change on your site properly. So to make sure your font is change properly You need to enable an option.

So to do that Let’s go back to ‘Customize’ And click ‘Google Fonts’. And then click ‘Debugging’ Now enable this option And click ‘Publish’. Once you have done this The font will be change properly on your site without any issue. So that’s it guys This is how to add custom fonts in WordPress website. Now if you want to learn more about WordPress, visit our blog page.
