


Today we will learn How to Configure DNS with the DigitalOcean DNS extension on Plesk. Recently we’ve learned How to configure DNS for a domain in Plesk.
By default a Plesk server acts as a master DNS server for websites hosted in it. Alternatively, you can use external third party DNS services to resolve domain names hosted in Plesk. For example digitalocean dns extension.

Let’s see how it works.
Configure DigitalOcean DNS extension On Plesk

First of all, we need to install the DigitalOcean DNS extension from the extension catalog. Note that no other DNS extensions like slave DNS manager or amazon route 53 are installed. So there are no conflicts between them.
Open the extension. Here we can see that there are two types of authorization namely oauth2 and API token.
Let’s try the one with API token first here we are asked to add a token which can be generated in your DigitalOcean account.
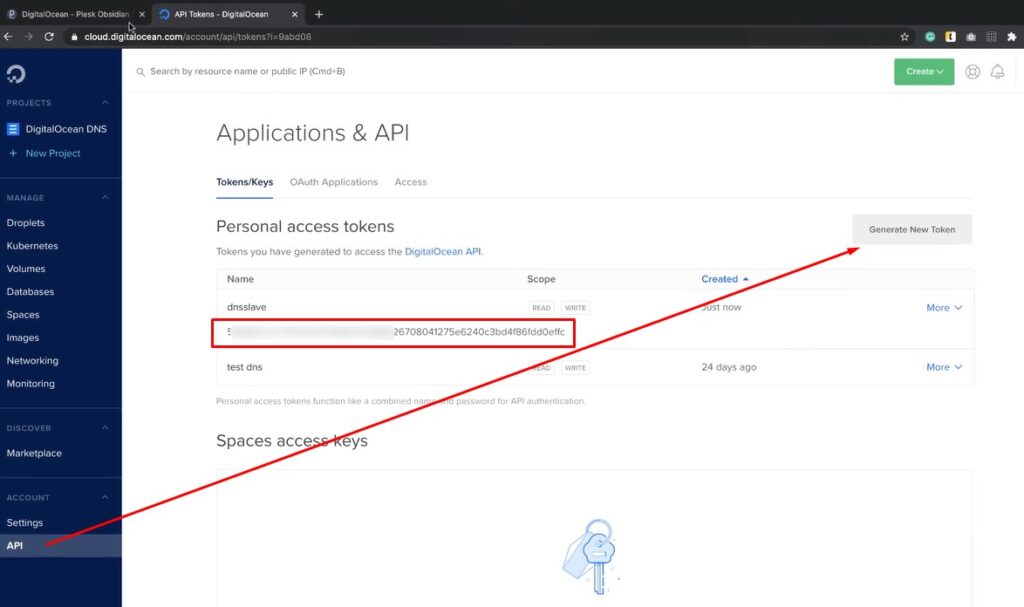
Log in to DigitalOcean and choose an API page. Click generate new token, enter its name and generate it.
Here it is! we need to copy it.

And paste back to the extension page, wait for a second, and we see that the extension is
connected to DigitalOcean.

Now we need to activate DigitalOcean DNS zones for all domains by pressing active all. So the statuses change from disabled to active on the DigitalOcean site.
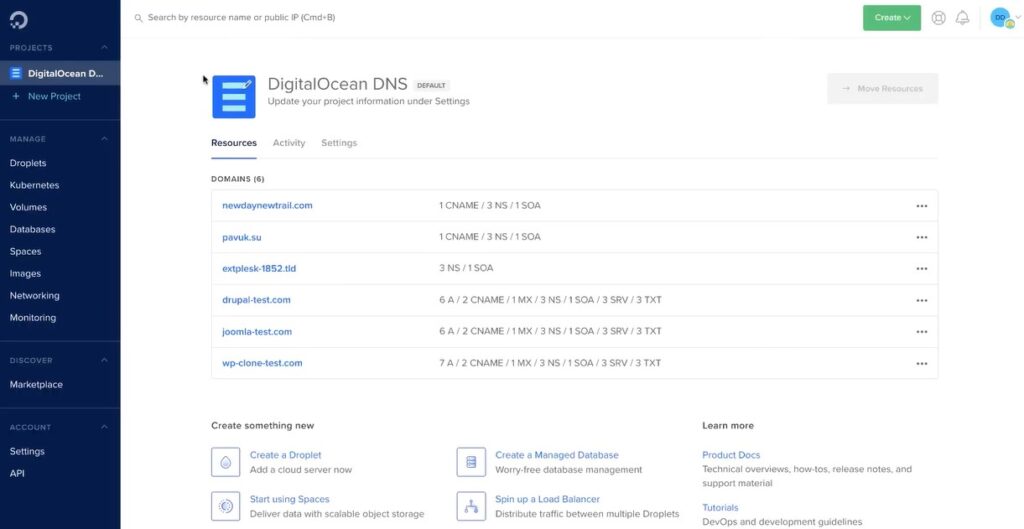
We can also check it right at DigitalOcean here the domains are also active.

Let’s try to authorize with oauth2 which means to log in with your DigitalOcean account just choose your account and authorize the application.

So click the suggested link to confirm your action

Finally we are logged in. And can activate DigitalOcean DNS zones for all domains again.

The zones are active both in the extension and in DigitalOcean all records have been synchronize for
both domains.
So we’ve managed to configure name servers with DigitalOcean DNS.
if you want to learn more please visit our blog page.


