


I’m going to show you how to configure different build tools in Jenkins.
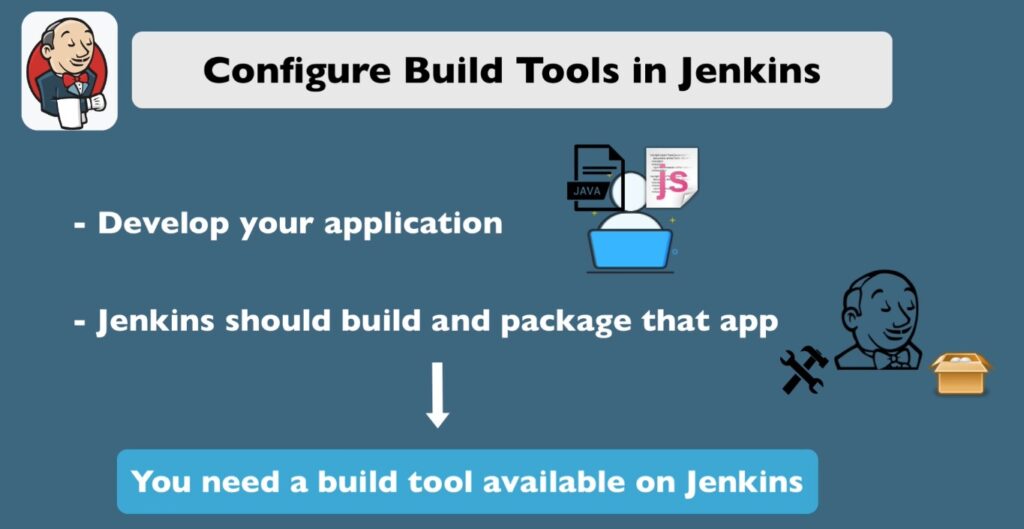
So the development flow usually looks like this. Develop your application and now using Jenkins you want to build and package that application.
In order to build the application in the package you need some kind of build tools. Depending on which technology which language you use. you are going to need a different build tool.

For example the four main tools that I’ve used commonly in projects and there some more but this four main are maven and Gradle for beckend applications. like if you’re developing your java application you probably use one of those. And if you have a JavaScript application then you are going to be using either NPM or yarn.
For example if you have frontend in JavaScript you will build it using NPM or yarn and backend you will build it using maven or Gradle. You will need at least one of those build tools in your Jenkins build configuration.
Because Jenkins build has to run these commands so how does it work how does Jenkins allow you to use these build tools. Some of these tools are available or installed in Jenkins out of the box. The rest of them you have to install as plugins and configure them.
Configure Build Tools in Jenkins
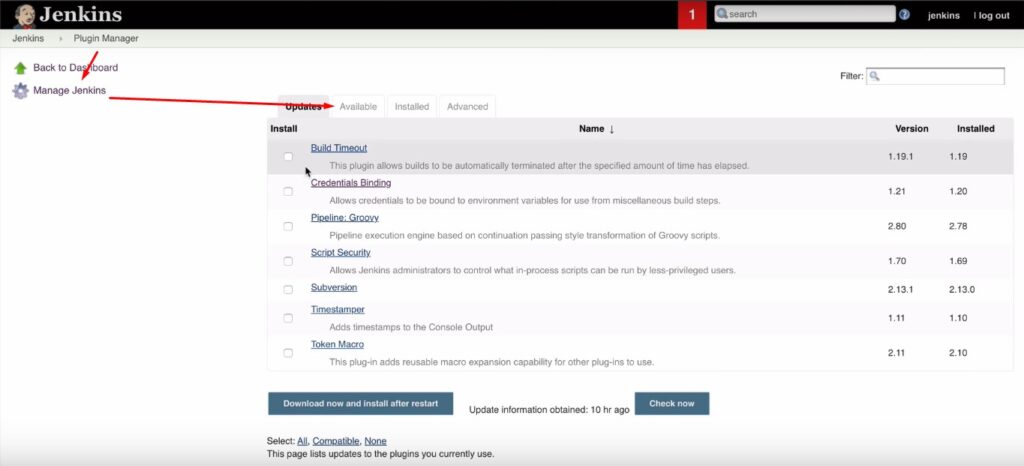
The first step that you need to do is to go to the Jenkins configuration and check whether your tool is already there out of the box if it is. You just use it if not you go to the plugins you install it.
Go back to the configuration and then you configure it. Once you have that already in a Jenkins configuration you can actually use it and the usage depends on what type of built of Jenkins use.
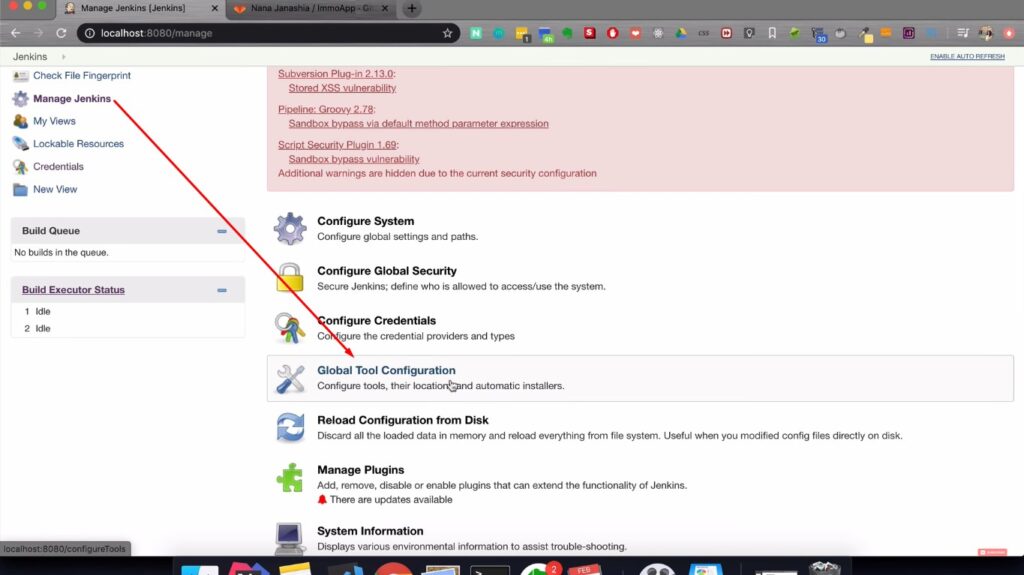
I’m going to show you example of using two of these tools actually in Jenkins file. So let’s actually go to “manage Jenkins” and “global tool configuration” that’s where all the tools are configured.
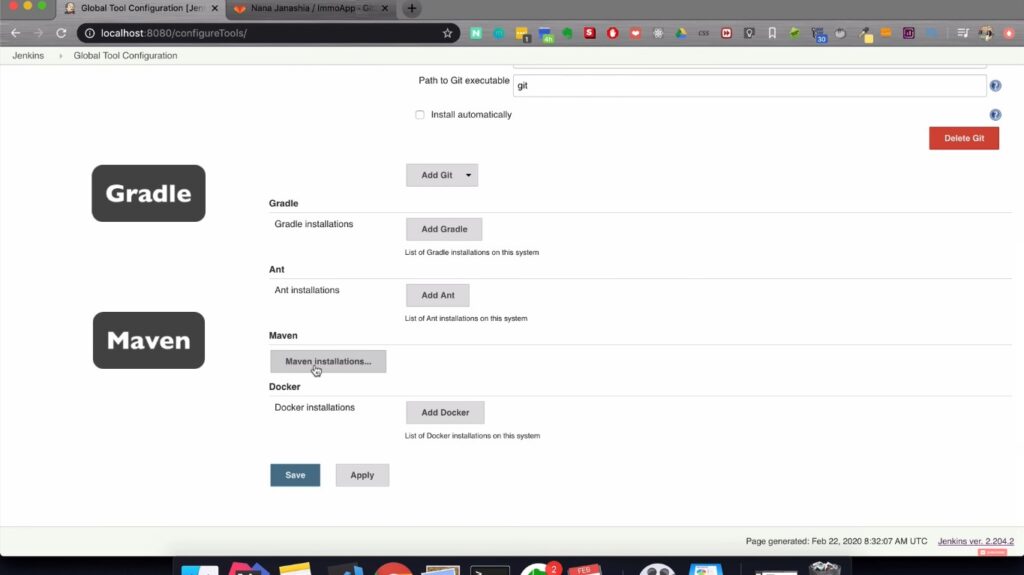
Here you can see the list of the out of the box available tools so if I scroll here I see I have Gradle and I have maven. Which is already configured for me and I have docker. What I don’t have here is NPM or yarn.
I’m gonna create an example Jenkins pipeline using a demo application that I have. And this demo application that I have uses Gradle and yarn to build backend and frontend respectively. Which means I don’t need the maven installation here I only need Gradle from here. In addition to that I will need yarn one.

If I hover here in Maven installation of version 3.63 which is installed directly from Apache from internet. so how this configuration works.
Gradle Installations

We can see it on Gradle example if I do add Gradle I just give it a name whenever I want. Here I choose the version actually I’m gonna go with the latest one.
You can also fix it a different version if your project needs that. Jenkins will install that tool automatically for me. I don’t have to go and install that on a Jenkins server or whatever.
Jenkins does automatically which is extremely convenient and this is basically the type of installer. so if you see here the button “installer” the options is installed from Gradle.org. which is what I have by default here so I’m gonna leave it at that and that’s it
Gradle is configured I can use Gradle now in my Jenkinsfile so I can save it.
Install npm and yarn from plugins
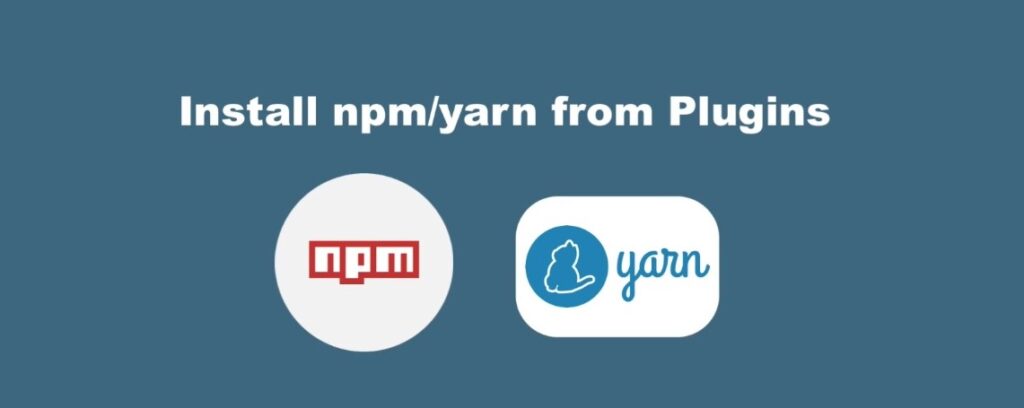
As I showed you I don’t have n npm or yarn installed.
In order to do that I go to “manage plugins” go to “Available” there is a specific “npm plugin” as well and “npm pipeline plugin”. The way I do this is I’m gonna install in “nodeJS plugin” which will give me the “npm” as well.
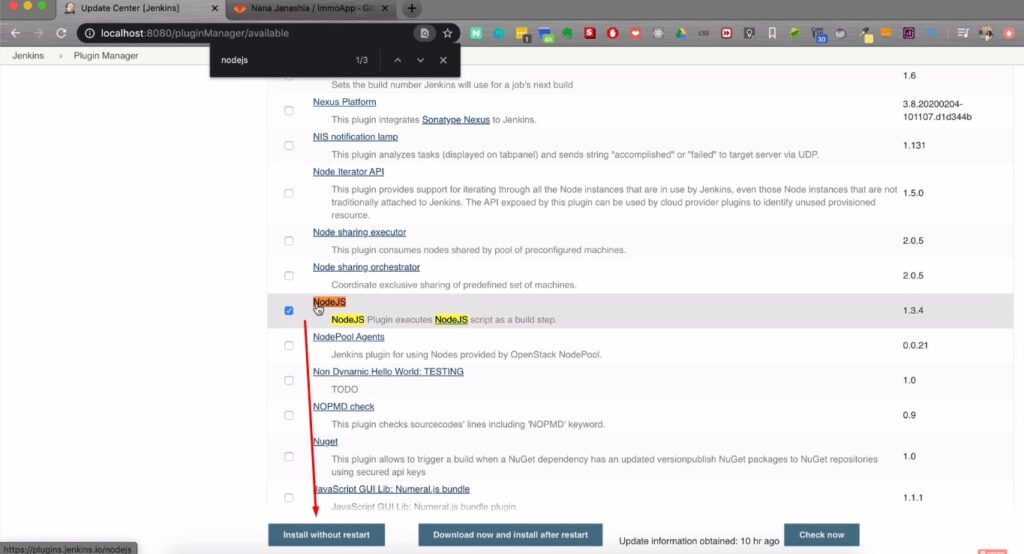
So I’m gonna install that after successful installation and I restart my Jenkins. Because you need to restart it so that the plugin changes take effect. Now if I go to “global tool configuration”.
NodeJS Installation
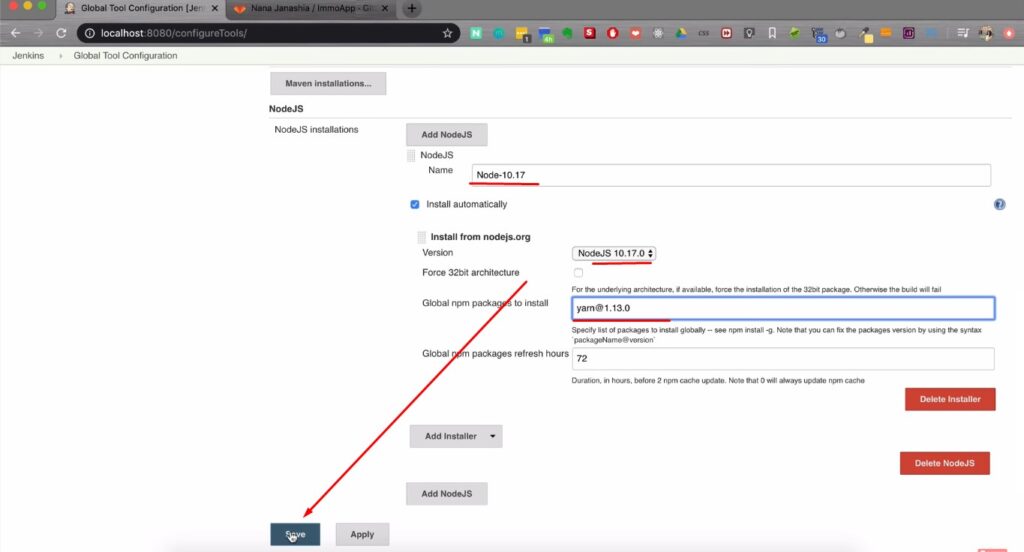
I should see the nodeJS in the list so I’m gonna add nodeJS. And the project that I’m actually works with the older nodeJS version. It has some backwards compatibility problem issues so I’m gonna fix a the nodeJS version to 10.17.0. So that’s the version that the application works on. Here the part where Jenkins automatically installing the nodeJS with this version.
I’m gonna give it a name let’s call it node-10.17 there is a common practice to name the installation with the version because if you have multiple of them you want to differentiate between node 1 no 2 so you can do something like i did.
You can make it to install global packages and yarn is one of the npm packages. So if I write a yarn here it’s gonna install that automatically. You can also fix its the version of NPM packages and I’m gonna need that as well. Because again my app doesn’t work with the latest yarn version. So I’m gonna fix that it like yarn@1.13.0. that’s a syntax for it.
I’m gonna save that so now when I create a pipeline I should have both Gradle and yarn available.
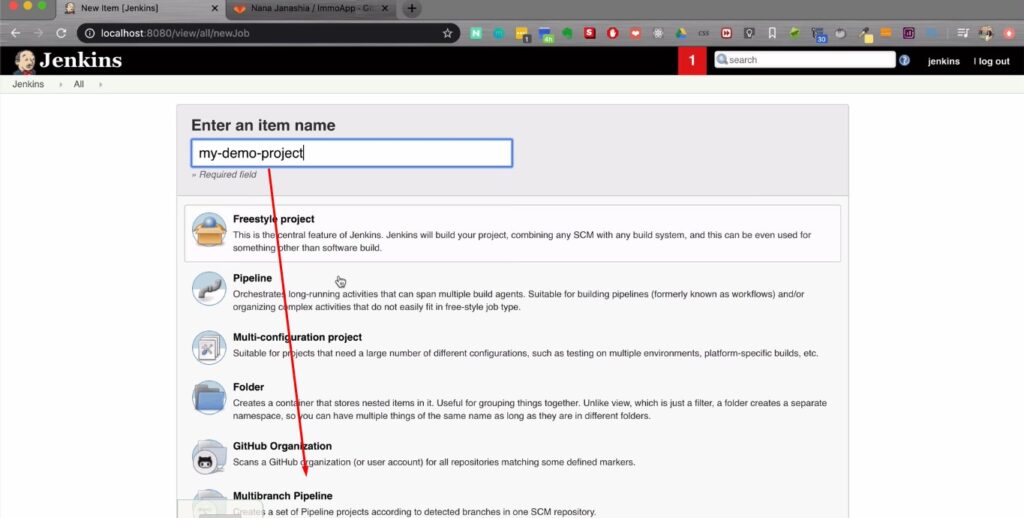
So I’m gonna create that pipeline it’s gonna be my-demo-project multibranch pipeline so that’s my repository.
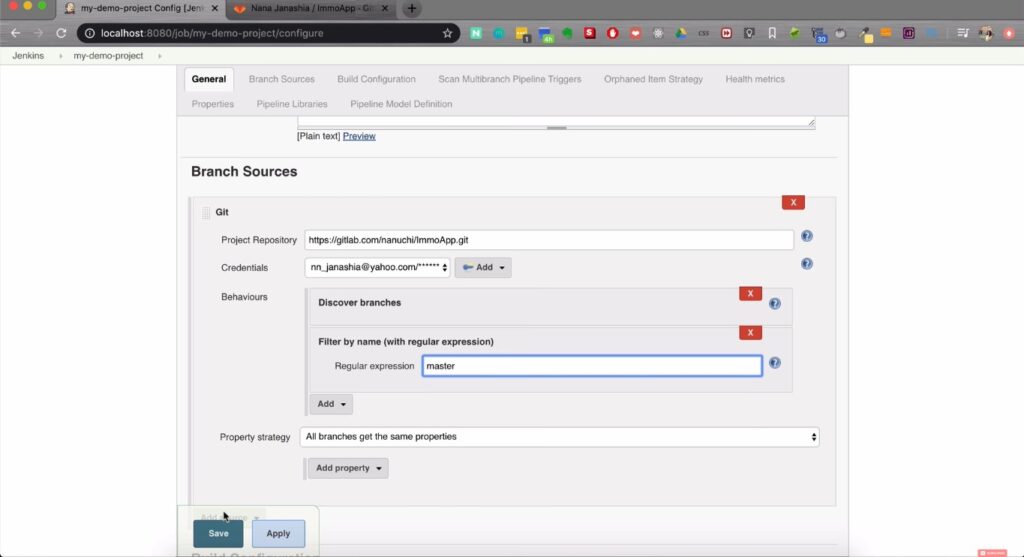
I have the credentials already configured and I’m gonna build only master here. It’s gonna scan the project for master and the Jenkinsfile. and I don’t have a Jenkinsfile in the master branch. So let’s go and create some very super simple Jenkinsfile just to demonstrate the usage of these two tools.
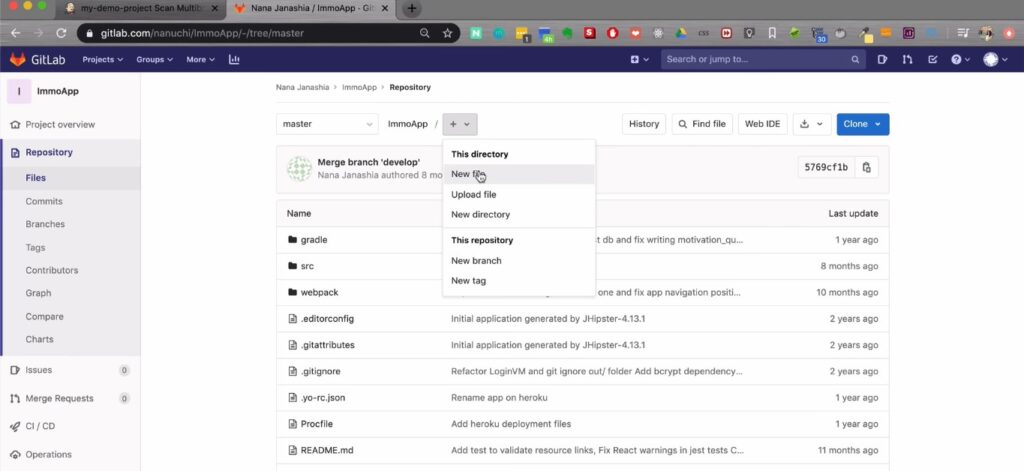
Here I’m gonna create a Jenkinsfile.
Configure Jenkinsfile to Build Tools in Jenkins
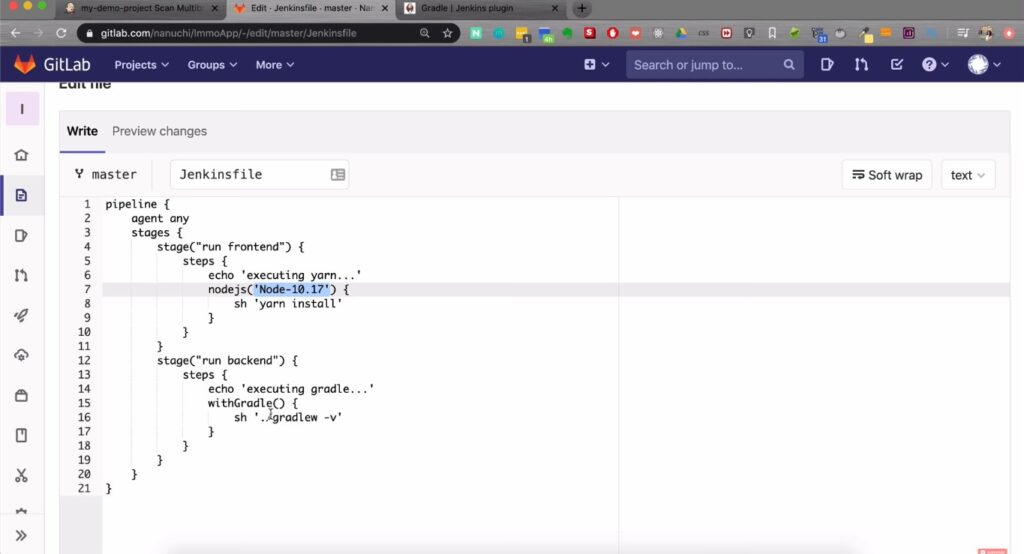
So this is a very basic pipeline syntax that has two stages we build frontend and we build the backend. The plan is to use yarn command in the first step where we build the frontend. And to use Gradle in the second step so the way to do that is using following syntax.
This is called wrapper of those tools that we’ve configured so the the wrapper is nodejs(‘Node-10.17’). Here I have to provide the name of that installation. Here so it knows that you are using that installation of node in here.
We create a block and the way you can run these commands is using:
{
sh 'yarn install'
}
So I’m gonna do a yarn I’m just gonna do yarn install just to demonstrate that the command is there.
In backend section here we’re gonna use the Gradle command and the wrapper for that is “withGradle()” which doesn’t take anything as a parameter so it’s just with Gradle and inside of that block we are gonna execute another shell command:
withGradle() {
      sh './Gradlew -v'
}
It sound like project is set up so I’m gonna commit that.
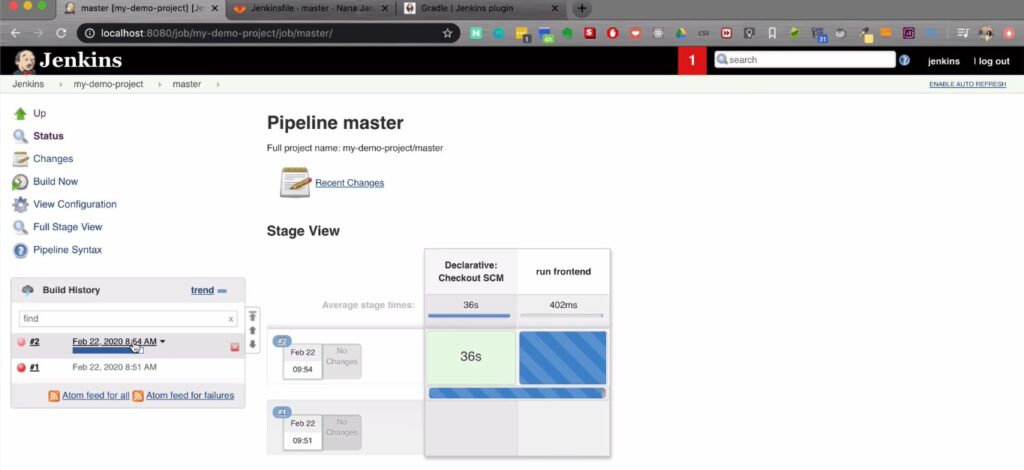
You see the master branch is scanning jenkinsfile was found and if I go to Master here it’s building master.
Master Branch Console Output

If I go inside let’s actually check the console output and here you see that yarn is executing, yarn installed and this is a version that we provided 1.13.0. Yarn install is running.
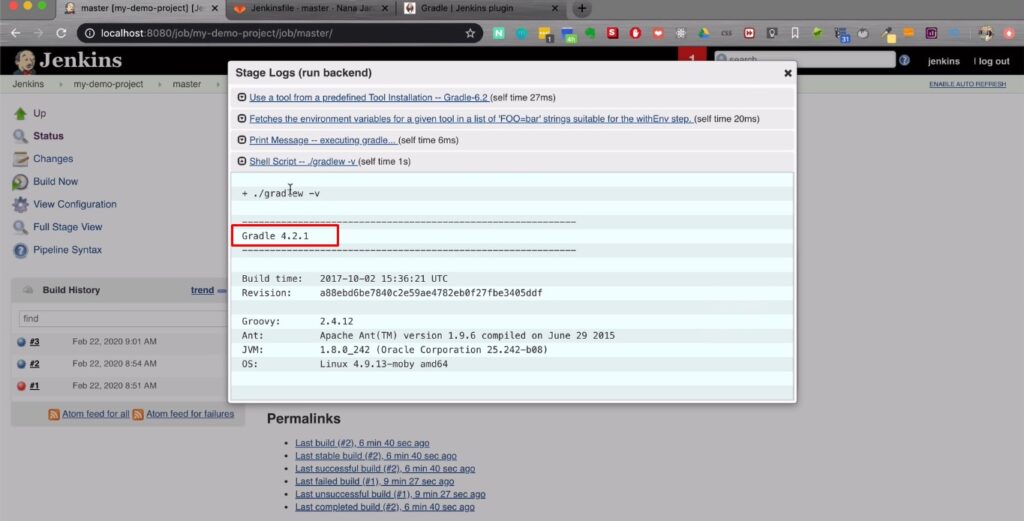
Now the Gradlew – v command ran and output the Gradle. Basically this proves that those build tools were installed by Jenkins automatically with the versions that I specified. and the commands run successfully so obviously the same way you can use maven and npm as well.
For example here since we have nodeJS which has NPM already installed instead of yarn you would just use NPM commands. Now there’s an alternative to using those tools without the wrapper. You may have seen it already in the Jenkinsfile syntax.
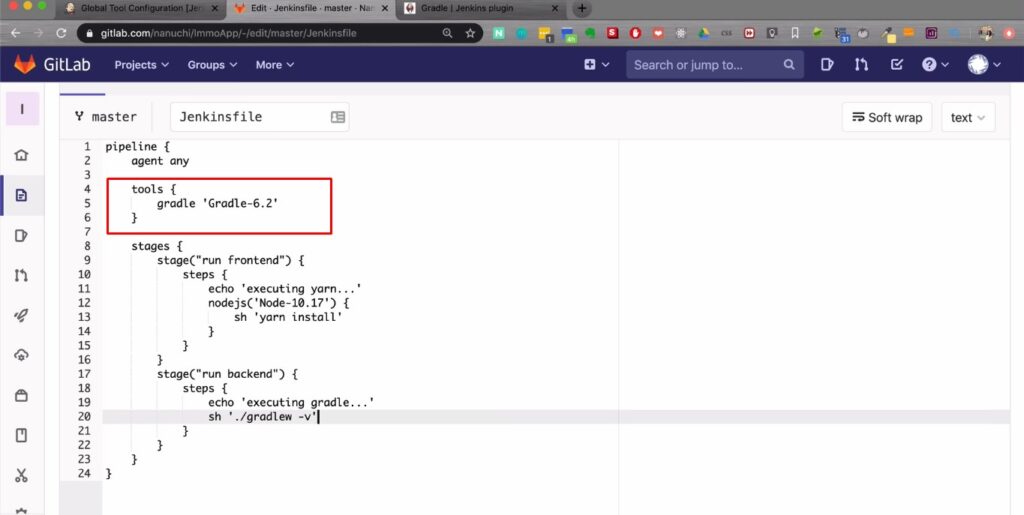
There is an attribute called tools and inside that you can configure which tools you are gonna be using in a Jenkinsfile. So it works the same as a wrapper however that tools plugin or the tools attribute supports only three tools by now. And these three tools are maven Gradle and JDK.
To use it i need this command:
Tools {
      gradle 'Gradle-6.2'
}
So basically these indicates to Jenkins that I want to use Gradle in my Jenkinsfile please go and fetch me the Gradle configuration that I’ve configured in the “global tool configuration”.
Update this and scan project go to master and see it’s built and it ran. I guess my preferred way is to do it like this so all the tools that are supported using this tools attribute. I’m gonna use them right like this because the steps part will be cleaner without the wrappers.
And for the rest you’re just gonna have to use the wrapper like this so that’s how you configure build tools and use them in Jenkins.
For more article please visit our blog page.